
Dessert Cup Recipes
Have you ever needed a dessert that’s as cute as it is crave-worthy? These dessert cup recipes are the perfect answer—easy to assemble, endlessly customizable, and guaranteed to make you (and your guests) smile. Whether you’re planning a party, prepping for a picnic, or just want a quick single-serve treat, dessert cups check every box: minimal mess, maximum flavor, and totally Instagram-worthy.
From layered parfaits with whipped cream and berries to indulgent chocolate pudding cups with cookie crumbles, there’s something here for every sweet tooth. The best part? No baking skills required—just a little creativity and your favorite ingredients. Let’s dive into these feel-good, fun-to-make desserts that turn ordinary moments into sweet celebrations.
Key Benefits of Dessert Cup
Dessert cups aren’t just adorable—they’re incredibly practical, versatile, and fun to make. Here’s why these individual dessert cups will become your new favorite go-to treat:
Perfectly Portioned
Say goodbye to messy slicing and uneven servings. Dessert cups provide the perfect balance of sweetness in each bite.. Whether you’re prepping for a party or making a treat just for yourself, the single-serve format makes life a whole lot sweeter—and neater.
Quick and Easy to Prepare
No time for complicated steps or oven drama? You’re in luck. Most dessert cup recipes are either no-bake or take just a few minutes to prep and layer. All you need are a few pantry staples, a fridge, and your favorite cups or jars.
Customizable for Every Craving
Chocolate lover? Fruit fan? Vegan or gluten-free? You name it—these desserts adapt effortlessly. Mix and match ingredients like pudding, crushed cookies, whipped cream, or fresh berries to build a layered masterpiece that suits your mood and dietary needs.
Kid-Friendly and Party-Perfect
Kids love building their own dessert cups, and adults enjoy their polished presentation at events. They’re ideal for birthday parties, bridal showers, or casual gatherings. Plus, no extra plates or slicing tools required!
Make-Ahead and Travel-Friendly
Because these are pre-portioned and contained, they’re easy to store, stack, and transport—no slipping, spilling, or last-minute decorating needed. Just pop on a lid or cover, and they’re ready to go wherever the celebration takes you.
Ingredients for Dessert Cup
The beauty of these dessert cup recipes lies in their flexibility. You don’t need fancy tools or a long grocery list—just a handful of simple ingredients that come together in fun, flavorful layers. Here’s a base recipe you can customize to your heart’s content.
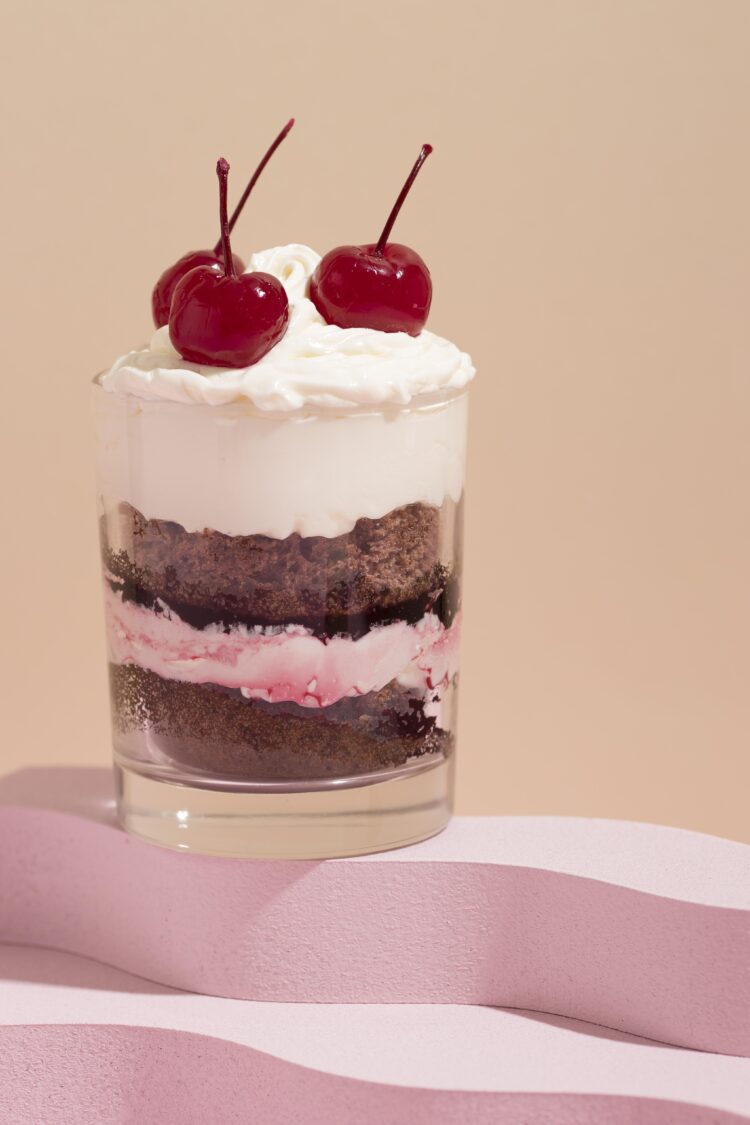
Base Layers (Pick One or Combine!)
- Crushed Oreos
- Graham cracker crumbs (mixed with a little melted butter for texture)
- Brownie chunks
- Vanilla cake cubes
- Granola (for a crunchier twist or breakfast-style dessert cup)
Pro Tip: Press your crust layer gently into the bottom of the cup for structure, but don’t pack it too tightly—it should still be soft and spoon able!
Creamy Fillings
-
- Chocolate pudding or vanilla pudding
- Whipped topping (or coconut-based whipped topping for a non-dairy option).
- Mascarpone or sweetened cream cheese (for a cheesecake-style cup)
- Yogurt (plain or flavored—for a healthier or breakfast option)
- Nutella or chocolate ganache (for a rich, indulgent layer)
Toppings and Mix-Ins
- Fresh berries (strawberries, raspberries, blueberries)
- Banana slices or mango cubes
- Mini marshmallows
- Shaved chocolate or chocolate chips
- Sprinkles or edible glitter
- Toasted coconut flakes or chopped nuts
Mix and match soft and crunchy ingredients for layers that are exciting with every bite!
Optional Garnishes
- A swirl of whipped cream
- Mint leaves
- A dusting of powdered sugar or cinnamon
- Caramel or chocolate drizzle
Instructions: How to Assemble Dessert Cup Recipes That Make You Smile
Now for the fun part—layering your dessert cups like a pro! This process is all about creativity and flavor balance. Whether you’re making just one or prepping a dozen for a party, follow these easy steps to build a beautiful, satisfying treat in minutes.
1. Choose Your Cups
Start with small jars, glasses, or disposable dessert cups. Clear containers work best so the layers can shine through. Think: Mason jars, stemless wine glasses, or mini trifle bowls.
2. Add the Base Layer
Spoon 2–3 tablespoons of your chosen base (e.g., crushed cookies, brownie pieces, or cake cubes) into the bottom of each cup. Lightly press down with the back of the spoon to level it, but don’t pack too tight—this isn’t a cheesecake crust!
3. Layer the Creamy Filling
Next, add a generous scoop (about ¼ cup) of your creamy filling—this could be pudding, whipped cream, or a mascarpone blend. Use a piping bag or spoon to smooth it out for a clean, even layer.
Pro Tip: Chill your fillings before assembling for neater layers and quicker set time.
4. Add Fruit or Mix-ins
Sprinkle in a handful of fresh berries, banana slices, or chocolate chips. This adds both texture and flavor contrast to the creaminess. You can also add a swirl of Nutella or caramel here for extra indulgence.
5. Repeat Layers (Optional)
Want extra height and drama? Repeat steps 2–4 for a double-layer dessert cup. The taller the cup, the more layers you can stack—just keep each one balanced.
6. Top It Off
Finish with whipped cream, sprinkles, or a drizzle of sauce. This is where your dessert gets its final “wow” factor. Add a mint leaf or mini cookie for flair if you’re feeling fancy.
7. Chill and Serve
Refrigerate for at least 30 minutes before serving. This allows the layers to settle and the flavors to meld. You can make these up to 24 hours in advance—just cover with plastic wrap or lids.
Pro Tips & Variations for Dessert Cup Recipes That Make You Smile
Once you’ve mastered the layering basics, it’s time to elevate your dessert cup game with smart tips and tasty twists. Whether you’re aiming for elegance or just want to keep things fun and fuss-free, these ideas—much like a well-crafted dessert pizza recipe—will help you personalize your treats and make them truly unforgettable.
Pro Tips for Picture-Perfect Cups
- Use a piping bag for clean layers:
Spooning can work in a pinch, but a piping bag (or even a zip-top bag with the corner snipped) makes layering puddings, creams, and mousses super smooth. - Pre-chill ingredients:
Cold pudding and whipped cream hold their shape better, making your layers more defined and helping the dessert set faster. - Balance textures:
Alternate soft and crunchy layers—like creamy fillings with cookie bits or granola—to keep each bite exciting. - Don’t overfill:
Reserve some room at the top for toppings.. It looks more polished and prevents overflow when you add toppings or serve. - Batch it smart:
Preparing for a party? Assemble in advance and keep them covered in the fridge. Just add the toppings right before serving to maintain crunch and color.
Tasty Variations to Try
- Strawberry Shortcake Cups:
Layer crushed pound cake with whipped cream and fresh strawberries. Drizzle with strawberry syrup for an extra burst. - Chocolate Lovers’ Delight:
Use brownie chunks, chocolate mousse, and mini chocolate chips. Top with fudge drizzle and a sprinkle of sea salt. - Tropical Vibes:
Combine coconut yogurt, pineapple chunks, and toasted coconut flakes. Add mango or passion fruit for color and tang. - S’mores Cups:
Graham cracker base, chocolate pudding, and mini marshmallows toasted under a broiler or torch for that campfire feel. - Vegan Dream Cups:
Use dairy-free pudding, coconut whipped cream, and gluten-free cookies. Add berries or almond butter for richness.
Serving Suggestions for Dessert Cup Recipes That Make You Smile
You’ve layered, chilled, and decorated your dessert cups—now it’s time to serve them in style. Whether you’re hosting a celebration or just want to enjoy your treat in a cozy setting, the way you present these individual dessert cups can turn a simple sweet into a standout moment.
Perfect Occasions for Dessert Cups
- Birthday Parties & Showers
Serve in colorful mini cups with little spoons or wooden dessert forks. Add custom name tags or themed toppers for a festive vibe. - Date Nights & Dinners
Present in stemmed glasses or lowball tumblers for a more elegant touch. Garnish with a sprig of mint or a drizzle of liqueur-infused sauce. - Picnics & Potlucks
Use mason jars or disposable plastic cups with lids. They’re easy to pack, stack, and serve—plus, no need for cleanup! - Kids’ Parties
Let the little ones customize their own dessert cups from a topping bar. Think rainbow sprinkles, gummy bears, and mini chocolate chips—pure joy in a cup.
Storage & Make-Ahead Tips
- Chill before serving:
Most dessert cups taste best when cold and set.Place them in the refrigerator for at least 25 minutes before serving. - Make ahead:
You can prep your dessert cups 24–48 hours in advance. Just wait to add crunchy toppings (like granola or cookies) until right before serving so they stay crisp. - Store leftovers:
Keep tightly wrapped in the fridge for up to 3 days. Avoid freezing unless using sturdy, freezer-friendly containers and layers like pudding or whipped cream (no fresh fruit).
Conclusion
There’s something undeniably joyful about dessert cups. Maybe it’s the layers of texture and flavor, the personal-sized portions, or just how fun and fuss-free they are to make. Whatever the reason, these dessert cup recipes aren’t just easy—they’re delightful little moments in edible form.
From creamy puddings and fruity layers to crunchy toppings and colorful garnishes, every cup is a canvas for creativity. And the best part? You don’t need to be a professional baker or have fancy equipment to make them shine. With just a few ingredients and a little imagination, you can whip up a dessert that looks impressive, tastes amazing, and makes everyone at the table light up.
Whether you’re planning a party, prepping for the holidays, or just want to treat yourself midweek (yes, you deserve it!), these dessert cups are the perfect solution. They’re customizable, make-ahead friendly, and always a hit—whether you go classic or get wildly creative with your layers.
FAQs
You’ve got your cups, your layers, and your toppings—but a few questions might still be on your mind. Here are the most common dessert cup FAQs to help you feel confident from prep to presentation.
1. Can I make dessert cups ahead of time?
Absolutely! In fact, most dessert cup recipes taste even better after a little chill time. You can assemble them up to 24–48 hours in advance, just be sure to hold off on crunchy toppings like cookies or nuts until just before serving so they stay crisp.
2. What size cups should I use?
4 to 6-ounce cups are perfect for individual servings. Mini dessert jars, small tumblers, or clear plastic cups work great and showcase the beautiful layers.
3. Are dessert cups freezer-friendly?
Yes—but with conditions. Pudding-based or mousse-based cups freeze well, but avoid using fresh fruit or whipped cream as the texture may change once thawed. Wrap tightly and freeze for up to one month. Thaw overnight in the fridge before serving.
4. Can I make them dairy-free or vegan?
Definitely! Use plant-based whipped cream, coconut yogurt, or almond milk pudding. Swap cookies for gluten-free or vegan options, and you’ve got a dessert everyone can enjoy.
5. How do I transport dessert cups for a party or event?
Use cups with lids (like mason jars or plastic containers), and store them upright in a shallow box or cupcake carrier. Keep them chilled with an ice pack if needed, and wait to add final toppings until you arrive.
6. Can I mix flavors in one cup?
Yes—and you should! Mixing flavors like chocolate and raspberry, vanilla and caramel, or coconut and mango adds depth and keeps each bite exciting.